
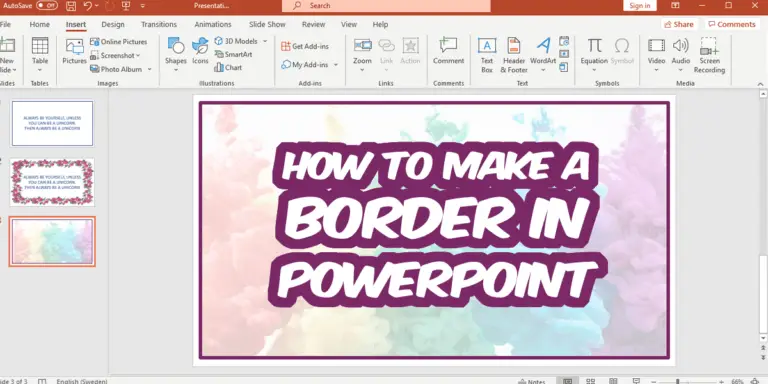
How to make a border in PowerPoint? Is that something you wondered about? This is probably because you have started reading this article. Maybe you thought it was a feature that should be clearly visible in the program? I also thought that the first time I wanted to do a border in PowerPoint.
You can stop searching the program for a feature that allows you to create borders in PowerPoint – you won’t find it! Instead, read on in this article, and I’ll show you several specific methods of how to make a border in PowerPoint.
Why use borders in PowerPoint?
This is a reasonable question to ask yourself, but there are several different purposes of using a border in PowerPoint. The most obvious reasons are that they can improve your design overall, and to highlight something extra important.

Furthermore, borders can make your slides look more organized and structured by simply framing your slides. However, borders do not fit all purposes or all slides. It can also be too much of a good thing. I recommend adding a border to your title slide, or to a slide where you should reinforce a specific message.
Tip! Want to learn how to make beautiful title slides? Check out this video series where I teach you how to create professional and stylish title slides from scratch.
Various options for adding borders in PowerPoint
Okay, now you know why and how to use a border in PowerPoint. Now it’s time to learn how to make a border in PowerPoint. There are a variety of methods to do this, below I present my favorite techniques. Do you have any tips on other methods? Write a comment below and I’ll include it in the article. Of course, you get credit for your contribution! 😊
Method 1: Create Borders Using Shapes.
This is a simple method that everyone can easily apply. You can also be creative and test different types of layouts without any problems. Here are the steps to do this.
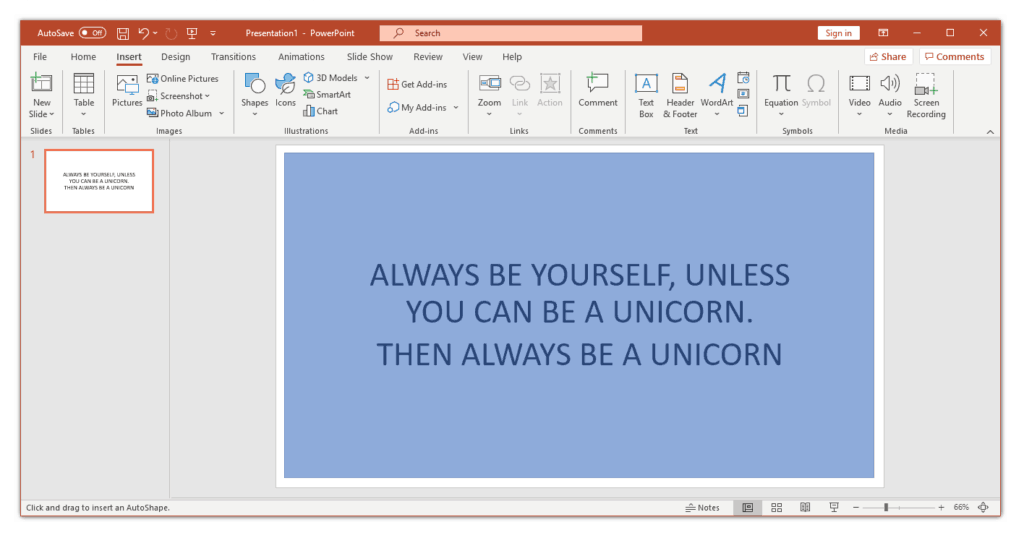
1. Start by going to the Insert tab. Then click Shapes and insert a rectangle.
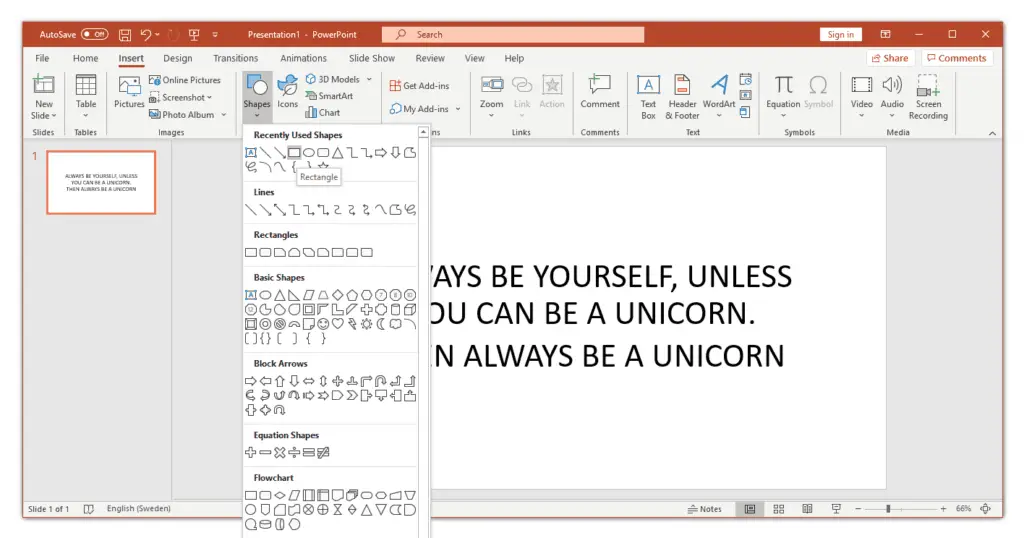
2. Position the shape in a way that reflects how you want the border to be. Imagine that the outer line of the rectangle will be the border
3. Select the shape and click Format Shape. You can now see the formatting menu on the right side of the screen.
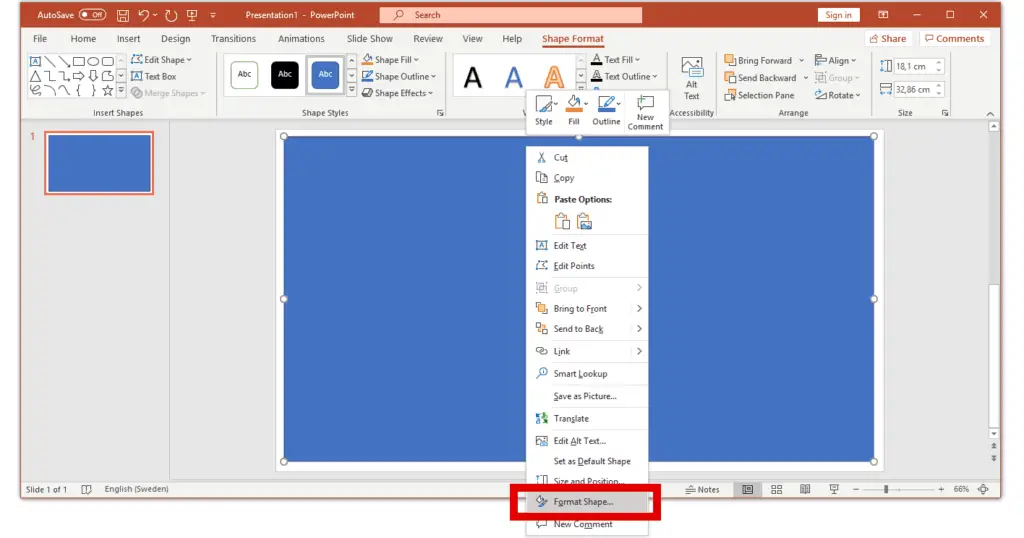
Click on the first symbol, Fill & Line. A little further down in this menu, you will find Transparency Options. Drag the slider to the right so that it shows 100%. Now only a line remains, which will become your border.
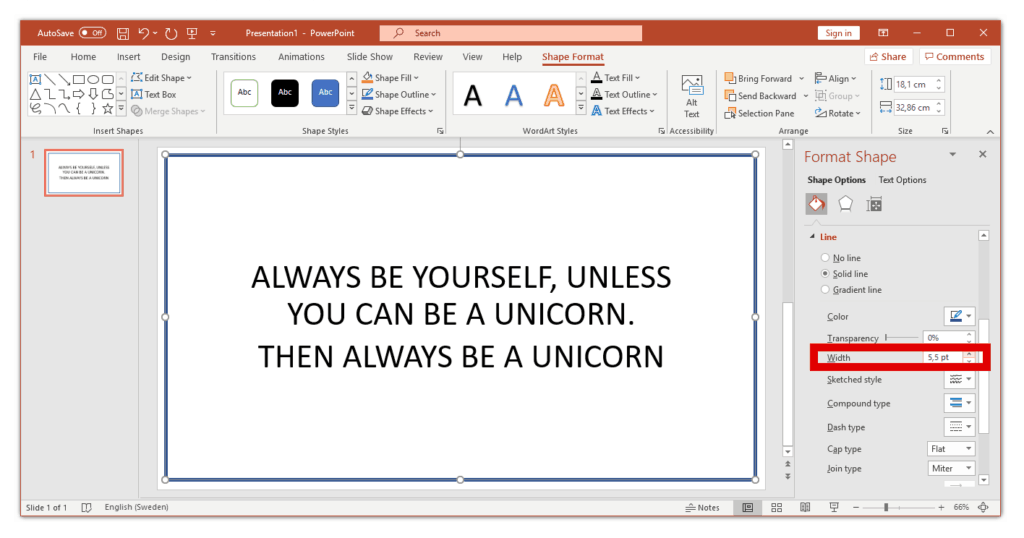
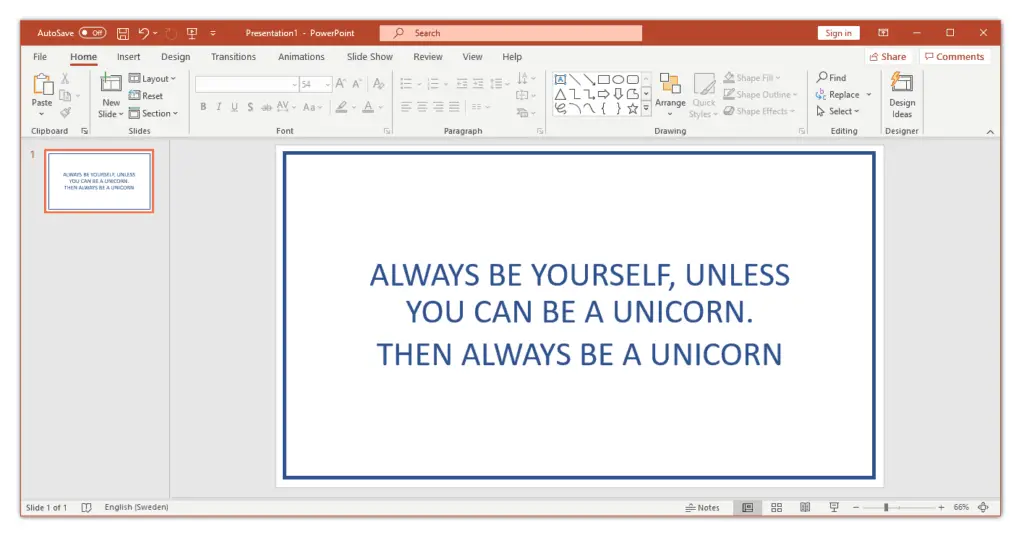
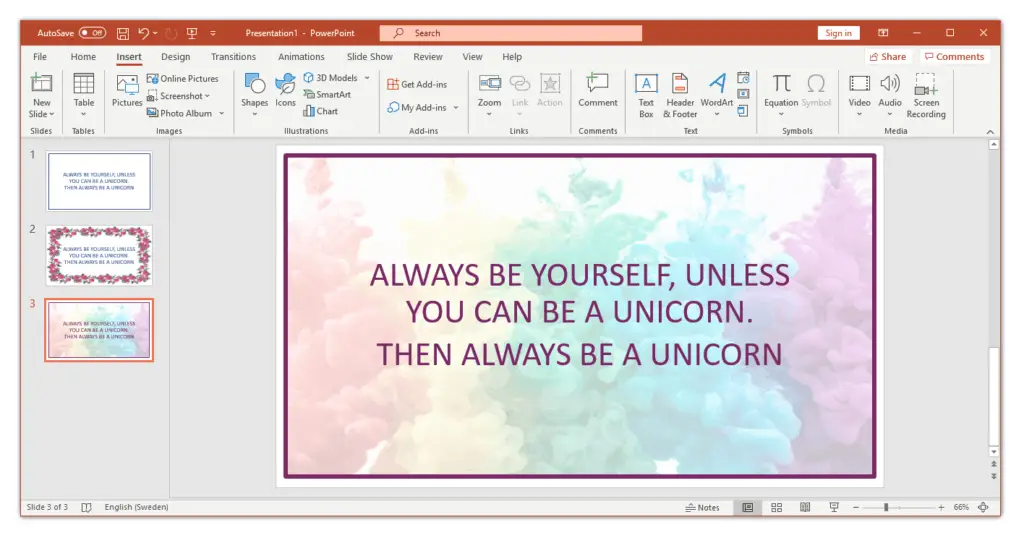
4. Scroll down and click Line, then adjust With to change the thickness of your border. Here are many different options, such as line color and Dash Type. Format the shape in a way that the border matches your presentation layout. Below you will see the final result, and you now know a simple method of how to make a border in PowerPoint.
Method 2: Insert a Border from the Internet
The next method of how to make a border in PowerPoint is straightforward and fits well if you want a slightly more effective border. If you’re going to make, for example, invitation cards or flyers in PowerPoint, this is an excellent method.
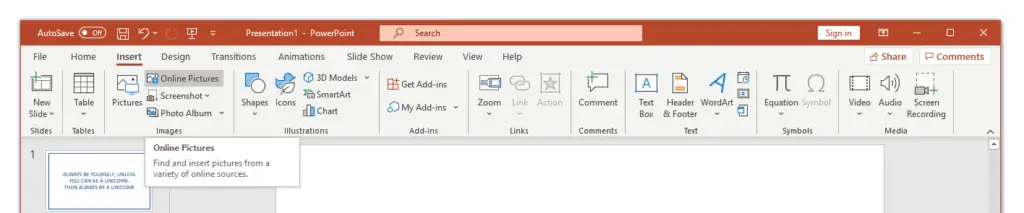
1. Navigate to the Insert tab, and click Online Pictures. After you click this icon, a new dialog box will appear called, believe it or not, Online Pictures.
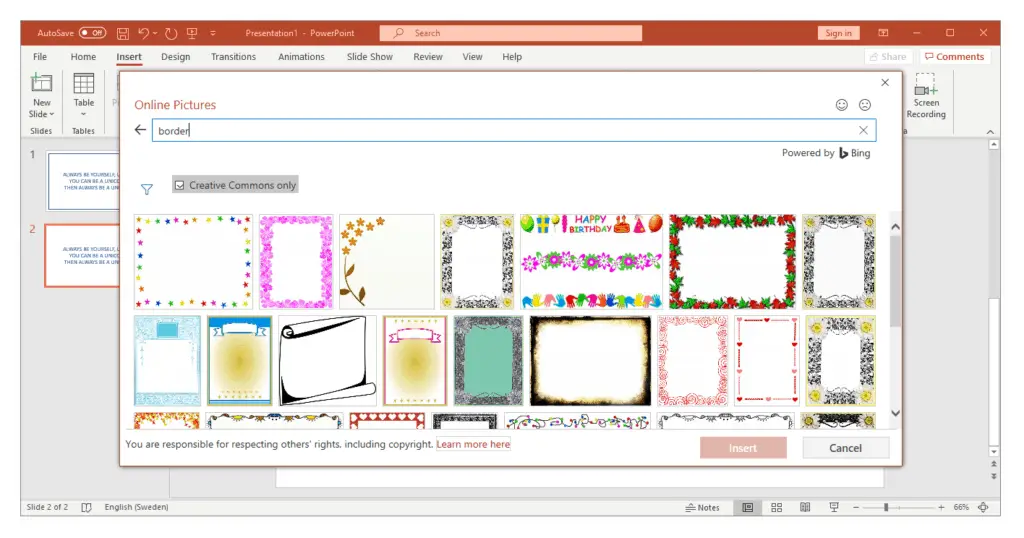
2. Search for the term “border” or variations of that word. Then select the border that suits you best and click Insert.
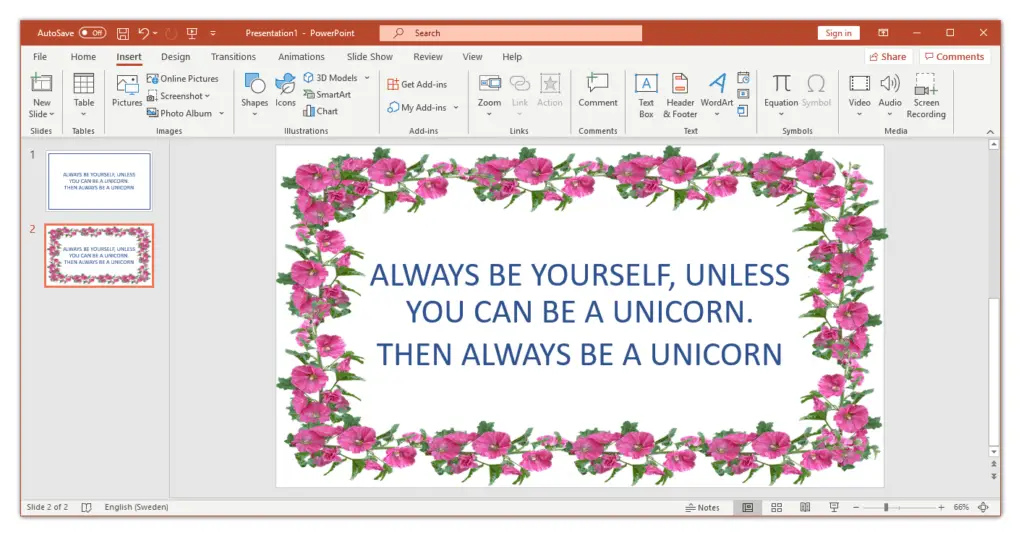
3. Adjust the frame to get the shape you want.
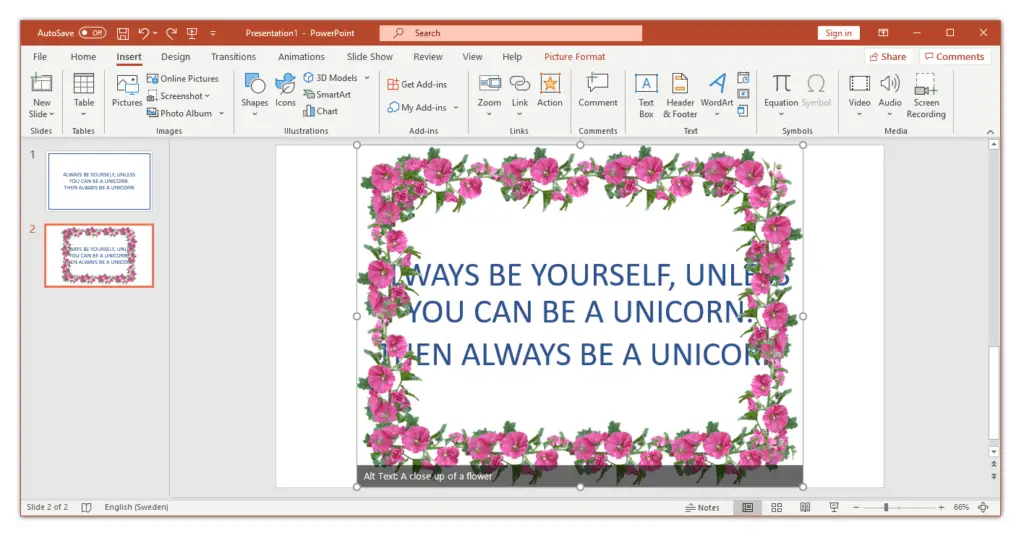
As you can see in the picture below, I have inserted a “nice” border made of flowers in my PowerPoint presentation. However, there are many layouts to choose from, and the “Insert Online Pictures” feature can be used for many different purposes. Also, I like that a source reference is included when you insert an image, which means you don’t forget to give credits to the author.
Method 3: Use an Image as a Border in PowerPoint
This last method of how to make a border in PowerPoint gives you a little more creative freedom. I will show you how to use a border-image. This can also be a great way to make invitation cards or make flyers in PowerPoint.
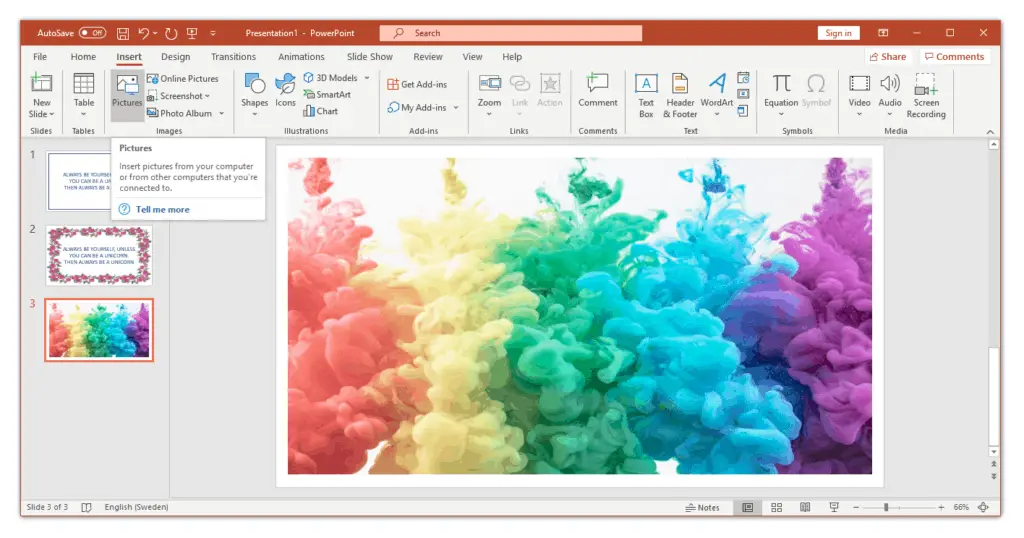
1. Start by finding an image that matches your theme and then insert the image into PowerPoint. First, navigate to Insert and then select if you want to insert an image that you have saved locally on your computer or if you want to insert an image from the Internet.
I chose to insert an image from unslapsh.com. This is a source I often use to find great photos, for free, for my slide decks.
2. Right-click your image, and then select Format Picture. Here you can format your image exactly as we did with our shape in Method 1.
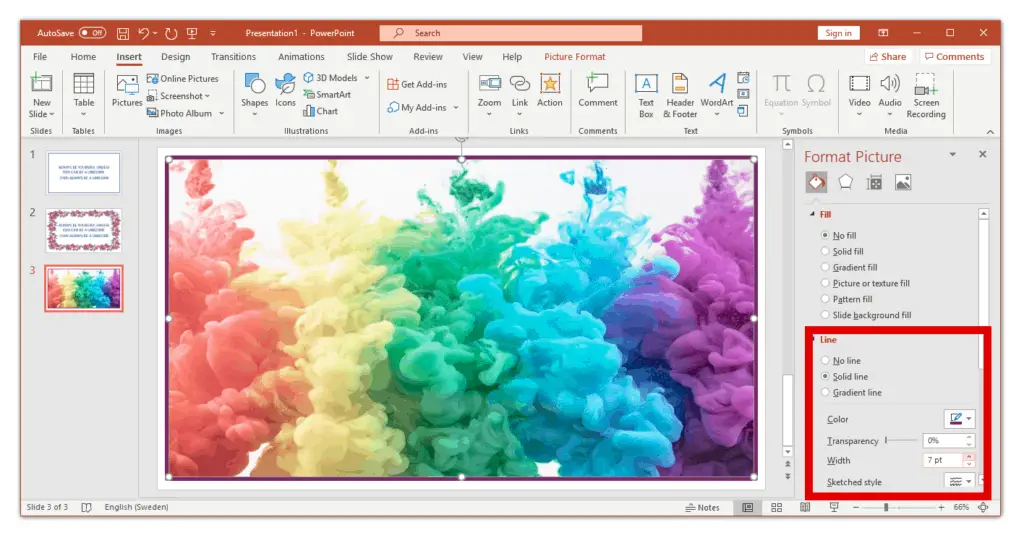
3. Click the first icon, Fill & Line, and then format the border of the image to give the border the look you want.
When you have a beautiful border, it’s time to make the image itself transparent so that you can write an invitation or a text. Also, this is a suitable method of how to make a flyer in PowerPoint.
4. Navigate to the icon on the far right, Picture. Then adjust Transparency so that your text is clearly visible in front of the image.

Below you can see the final result!
This is an excellent method of how to make a border in PowerPoint. If you have a good sense of design, you can create very stylish layouts. However, be careful when using images as backgrounds as it can be messy and difficult to read.
Best Practices for Borders in PowerPoint
When, where, and how should you use borders in PowerPoint? This is a good question, which is also difficult to answer. Below I list some things I take into account when using borders in PowerPoint.
Do not use too complex designs. It’s easy to take your creative freedom too seriously and start using frames with too many elements – don’t do it. Use simple and clean lines.
Use straight lines. I have seen presentations with borders in all kinds of shapes, often it will not be useful if you do not use rectangular shapes. Using an oval shape as a border is something I see often. I understand the idea, but it often creates a lot of “dead space” that you can’t use for anything else.

Don’t let your frame draw attention from the message. Always remember that it is your message that should be at the center. Test your slide on a friend and colleague by asking the question “what is the first thing you think of when you see this slide?”
Use borders sparingly. Okay, now you’ve just learned how to make borders in PowerPoint, but don’t overuse this new knowledge. As I wrote in the introduction, it is best to use border for your title slides or in slides with quotes or similar.
Use soft and warm colors. This is generally the case when building your PowerPoint slides, but keep in mind that a border should just frame your message. The viewer should not really think about it, it should reinforce the focus on your message.
Conclusion of How to Make a Border in PowerPoint
There are many methods of how to make a border in PowerPoint. It is usually a good idea to use a border when you want to reinforce a message or create a beautiful title slide. Furthermore, it is an excellent method of how to make a flyer in PowerPoint.
However, remember to be restrictive in your use of borders. Don’t over-use borders. Furthermore, it can also take unnecessarily much time for your creation as it actually takes a few minutes to make a nice border in PowerPoint.
Final Words
As usual, thank you so much for taking the time to read this article. Feel free to spread it to friends and colleagues you know work a lot with PowerPoint. If you have specific requests for guides and PowerPoint tutorials, please leave a comment below, and I’ll fix it.